|
In our latest series of Technical Zone articles, Greg Commins looks at the four possible threats the defending team needs to cover when defending from the scrum:
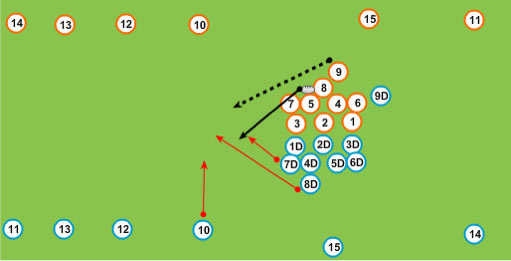
To defend the pick and go the defending scrumhalf needs to be very alert. As soon as the opposition has hands on the ball he needs to call ‘BREAK’ or whatever your team uses to communicate the ball is out. Reaction speed is vital, it is a race to the advantage line for both teams.
It is quite common to have a big burly #8 charge into a vulnerable flyhalf channel to create forward momentum, this is why the open side and #8 need to eliminate this threat by working together (see below).
|
|

|
|
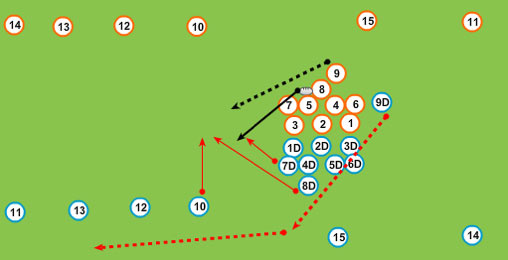
It is very important to teach a defending scrumhalf that if they cannot make an impact at the back, don’t follow the ball around the scrum as they will be running behind the attacking backline, to be more effective they should back track and run back behind their own backline as a sweeper and extra defender (see below)
 |
|
Sometimes a team will attack the left hand side, it is key for the defending #9 to ‘sweep the ankles’ as this stops the #8 and forward movement dead in its tracks.
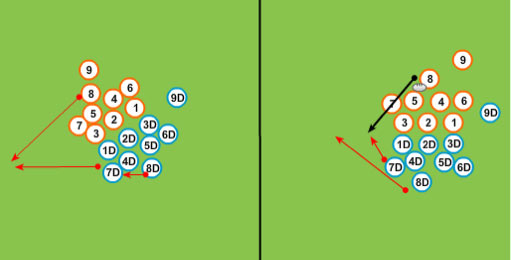
The pack also has a big job and they should always aim to block the opposing forward pack from getting their attacking shoulder, which is the wheel in the direction of the pick up, usually the right shoulder. If the scrum is wheeled the defending flanker and #8 get pushed further away from the advantage line making it harder to defend the pick and go (see below).
The defending #8 will get blocked from effectively defending and the open side flanker will have further to track to make the tackle, not an ideal situation to be in.
|
|
by Greg Commins | rugbyIQ.com Technical Zone |


